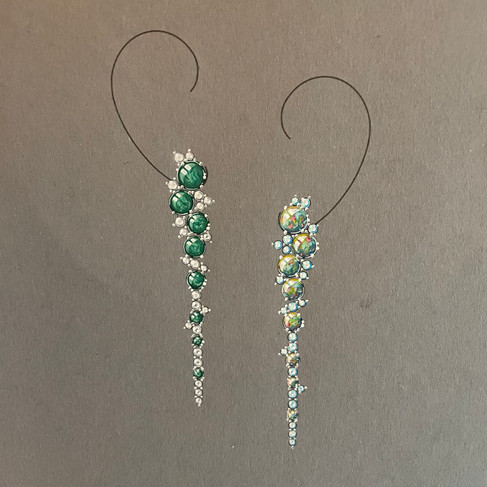
Hello everyone! Today, we wanted to share a technique for optimizing your drawings before posting them online. We frequently receive questions about the paper we use or how we scan drawings to achieve a clean look.
Typically, we stick to Clairefontain PaintOn Pads with 30 sheets when drawing. However, when it comes to showcasing drawings on online platforms, whether in a portfolio or on social media, achieving a clean look can be challenging with just a photo or a standard scanner. Since not everyone has access to a high-end scanner, we employ a different approach.
For this purpose, we use the Procreate app, a well-known program among jewelry designers. While we primarily use Procreate for drawing jewelry designs, creating technical drawings, and making templates, it is also handy for cleaning up jewelry pictures. While there are multiple ways and programs like Photoshop or Illustrator for cleaning up drawings, we´re sharing what we think works best for a quick post, especially since you can do it on the iPad wherever you want.
Let's dive into the process:
1. Ensure you capture a sharp picture of your jewelry drawing. Don't worry too much about the appearance of the gray paper or shadows, it's more crucial to have a sharp image of your painted jewelry. A valuable tip is to always take pictures in daylight, as natural light enhances the colors without the interference of artificial lighting.
Do - Daylight Don´t - artificial lighting
2. Once you've taken the picture, transfer it to your iPad or Procreate-enabled device. If you're using Apple devices, Airdrop makes this process seamless.
3. Open Procreate and add a gray paper background (available on Google or you can use the one provided in this post).
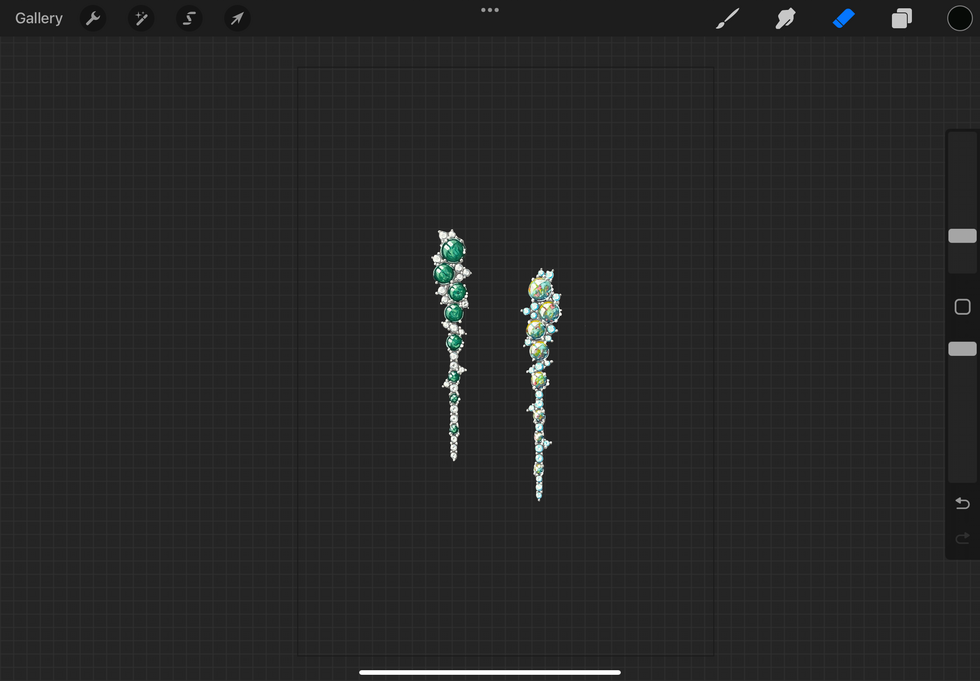
4. Import your picture into the open Procreate window, and ensure that the layer containing the digital gray paper is turned off. It is easier to outline the painting this way.
5. Use the eraser to outline your drawing and remove the rest of the picture. There are various methods in Procreate, such as using the cut option to directly remove colors. However, when working from a picture with a gray paper background, multiple hues may complicate the cut option. Erasing around the jewel works best.
6. Center your drawing on the digital gray paper, and you're done! Upload it to your gallery and use it as you wish.
Before After
So here it is.. Our quick cleanup method for preparing drawings for digital use. We´re not claiming that this is the definitive way to do it. If you're aiming for prints or need more intricate and refined results, we recommend exploring other techniques. However, for a quick post or portfolio update, this is a highly convenient approach.
We hope you all enjoyed and can appreciate this post.
_edited.png)


Comments